Saturday, June 30, 2012

Book Worm

We are continuing our celebration with more blog hopping!  Don't forget to visit all of our returning guest DT's blogs to see all of their projects and gain some inspiration!  Here's the blog hop order in case you forgot...

Sister Stamps blog (You are here):  http://sisterstamps.blogspot.com
Mama:  http://luvnthejourney.blogspot.com/
Amy:  http://athousandsheetsofpaper.blogspot.com/
Leanne:  http://liloshaggymoto.blogspot.com/
Nadine:  http://wahinelei.blogspot.com/
Donna:  http://3umbrellas.blogspot.com/
Kris:  http://klusivekreations.blogspot.com/
Linda:  http://simpleandsassycreations.blogspot.com/
Cami:  http://captureaheart-cami.blogspot.com/
Jenny:  http://crazyforpaper.blogspot.com/

If you ever met Akemi, you'll know she is a book worm.  She always has her nose in a book or is talking about a book.  So when I saw this tutorial by the Rubber Cafe, I totally thought of her.  Originally, I saw this work of art by Mama and I wanted to try it out, but didn't have the time or energy to convert the measurements from metric to inches.  Then my girl Linda told me about the Rubber Cafe's tutorial and I got re-inspired to try it out.  Thanks Linda!

So here's my version of the book box...  Wen't with just a plain sentiment by Papertrey Ink for the front of the card and embellished it with flowers by All Natural Accents and a butterfly (sorry no manufacturer name on the packaging).  The sentiment was embossed with gold embossing powder and mounted on Spellbinder labels dies on washi paper I got from the Paper Source.  I love the papers I got on my trip to CHA.  I am hoping I can visit them again when I go back to LA in the fall.  I really need more of this paper!!


Here's a close up of the front.


Decided to take a photo of the side view so you can see that it really does look like a book!

And here's what it looks like when you open the book.  I love that the inside is like a shadowbox!


To make it look like a true shadowbox, I made layer upon layer for added dimension.  The "hills" were cut using a Papertrey ink die" and the banner was made with my Law Fawn banner stamp set and matching ABC's set.  I actually colored the banner with my copics so that the color would match the rest of the project.  Don't know if you can see it, but the background is a very muted washi paper. I love it!!!  It actually has a lot of design, but because the pattern is so muted, it doesn't take anything away from the image.  The flowers were from All Natural Accents and Wild Orchid Crafts.


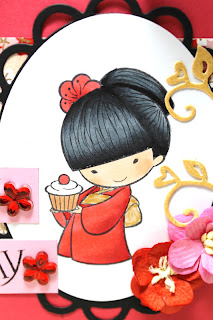
Here's a closer look at Miyoko.


I'll definitely have to try this project again!  It was so much fun creating a scene!  Don't forget to check out everyone's creations- your next stop is Debi's blog!

Friday, June 29, 2012

Birthday Boy

Hi There!  Back again with another sample by Aunty Jan.  I'm so happy that she is able to participate in our blog hop even though she doesn't have a blog. Speaking of blog hop, don't forget to hop on over to all of our sisters to see what else they've come up with with our new release images.

Here's the blog hop order:

Sister Stamps blog (You are here):  http://sisterstamps.blogspot.com
Mama:  http://luvnthejourney.blogspot.com/
Amy:  http://athousandsheetsofpaper.blogspot.com/
Leanne:  http://liloshaggymoto.blogspot.com/
Nadine:  http://wahinelei.blogspot.com/
Donna:  http://3umbrellas.blogspot.com/
Kris:  http://klusivekreations.blogspot.com/
Linda:  http://simpleandsassycreations.blogspot.com/
Cami:  http://captureaheart-cami.blogspot.com/
Jenny:  http://crazyforpaper.blogspot.com/


Today's project by Aunty Jan features the birthday boy Takeo.  She used beautiful washi paper as the background and mounted it on gold mirrored cardstock.  The sentiment was stamped using a Hanko Designs stamp that translates to Happy Birthday.  She finished off the edge using a Martha Stewart punch.  I don't think you can tell, but Takeo was popped up using pop dots.


Here's a close up of Takeo...


Don't forget to hop on over to Debi's blog next for more Release #8 fun!


Thursday, June 28, 2012

Just A Little Something...

Greetings Everyone!  Did you like our introductory posts?  I hope you like the new images as much as I do. I've been waiting and waiting to be able to share these with you.. AND to share more exciting news about this release!  Since this is an extra special release, I decided to invite all of our friends back who have helped us along the way to help us once again with this release!  Please welcome back Mama, Amy, Leanne, Nadine, Donna, Kris and some new faces- Linda and Cami to our Sister Stamps family! They all join me, Debi, and Aunty Jan in a special 3-day preview blog hop!  Here's the blog hop order so you can catch up with our friends and see what they've been up to.


Sister Stamps blog (You are here):  http://sisterstamps.blogspot.com

Mama:  http://luvnthejourney.blogspot.com/
Amy:  http://athousandsheetsofpaper.blogspot.com/
Leanne:  http://liloshaggymoto.blogspot.com/
Nadine:  http://wahinelei.blogspot.com/
Donna:  http://3umbrellas.blogspot.com/
Kris:  http://klusivekreations.blogspot.com/
Linda:  http://simpleandsassycreations.blogspot.com/
Cami:  http://captureaheart-cami.blogspot.com/
Jenny:  http://crazyforpaper.blogspot.com/

Aunty Jan sent me some Release #8 samples that I wanted to share with you..  The sample I have to share today features Mariko on a tag pocket card.   As you can see, the tag slips into the pocket ever so nicely.  She used a plum blossom stamp by Hanko Designs for the background on the face of the pocket and the tag.  She must've used the masking technique on Mariko in order to get the background around her so nicely.

The Just a Little Something Sentiment is by Amuse Rubber Stamps.  She even added some stickles over the sentiment to make it glisten.

OK I just gotta point out the trim on the tag.  I love how she combined sheer ribbon with gold ribbon and then baker's twine to keep it neat.  Love that- gotta remember to do that next time I make tags.

Thanks Aunty for the samples!  I'll be sharing more with you soon!  Now it's time to check out Debi's blog to see her Release #8 projects.

Wednesday, June 27, 2012

Here's Takeo!

Hi Everyone!  Back with our last Introductory Post for this release... today, I'm excited to introduce to you Takeo!  He comes ready to party with all his balloons in tow.  I just love his expression as he looks just as excited as I am about this release!

Takeo is named after Debi's 3-year old son.  He is the smartest 3 year old you'll ever meet!  I thought my Akemi was smart, but I think he gives her good rubs when it comes to intellect.  One day I watched Takeo for his mommy while she taught a class.  Although he was not potty trained at the time, he could navigate through the internet and find all kinds of street signs, the Disney Channel website, and find California Girls on my iphone (and sing it all too I might add).

A few months later, I bought him some bicycle and people wood images (the kind you see on restrooms to tell you if its for female or male) so he could play with them since he loved signs so much.  His mommy wrote something to the effect of "Share the Road" and I swear to god he read it!!!  I asked her if he could read and she said he can.  AMAZING!  It wasn't just ABC's now... I'm talking words and small sentences.  I'm still in awe. I know it's probably just memorization, but still... that's pretty darn amazing.

So now that you know a little more about Takeo, let's share today's project...  When our New Year's images released last year, I shared with your a short tutorial on how to make li see packets.  Well, using the same concept, I came up with this money envelope, only it opens sideways instead- more like a regular envelope.  Kept the layout very simple by using my go to- horizontal washi paper strip and added a red cardstock strip over it.  Since it looked a little plain, I stamped Happy Birthday with my old Hero Arts birthday stamp.    This money envelope can be used for any kind of gift giving.  I think they are great for graduations and even thank you gifts.  Another version of this project will be a make 'n take on my make 'n take tour of Oahu next week.


Here's a close up of Takeo.  I love how his balloons are on a bamboo shoot!


And just so you can see, I took a photo of the back so you can see where the money goes in.


And I'm sure you are waiting for the giveaway right?  OK here goes... follow the same instructions from the Mariko post (two days ago) and tell me about your favorite birthday memory... I guess mine would have to be my sweet 16... totally got surprised at Bobby McGees--- Does anyone remember that place?   I think we still have the bathtub and toilet bowls from there somewhere in my mom's house.  They must be collectors items by now.

Tuesday, June 26, 2012

Say Hello To Miyoko!

Welcome back!  Are you liking the release so far?  I sure hope so!  Well, today I have another cutie to share with you.. Say Hi to Miyoko!  Miyoko is named after my childhood BFF.  We met in intermediate school and became immediate friends.. after going to two different high schools, we reunited again at UH and have been besties ever since! Although we live on different islands and don't get to see each other much anymore, we still share a special friendship.


On to the project!  I just love that Miyoko is holding a cupcake.  What's a party without cake right?  Her pose is just too cute and sassy too!  I decided to make another easy peasy project for our upcoming make 'n takes.  This gift bag is actually the brain child of Debi.  Way back when I first met Debi, she shared a project using a paper bag that was covered on either side to be used for gift giving.  So what I did here was cut a paper bag down to 5" x 5".  Then I covered each side with 5 1/4" x 5 1/4" cardstock, punched holes and added ribbon for the handles.  Voila!  Instant gift bag! You could change up the size depending on how big your gift is and how big your bag is.  


I cut a washi paper strip about 3" wide to go across the bag, then added my Miyoko image mounted on a Spellbinder oval and lacey oval die cut.  The bag looked a little plain, so I added in a Happy Birthday sentiment from an old Hero Arts stamp set.  The stamp was originally all horizontal, but I cut two strips of 3/4" cardstock in pink and stamped Happy on one and Birthday on the other and then cut the ends to look like a flag/banner.  Added in the crystal flower accent which I picked up from a local craft store (sorry no manufacturer name was on the bag).  Then added a heart flourish by DooHickey dies (Magnolia) and some cherry blossoms by Wild Orchid Crafts.

Here's a close up of Miyoko.  Do you like how I colored her hair?  I saw past DT member Amy Young color up Akemi this way and I love the way it came out!!  Thanks Amy!


And now for more candy!  Follow the same rules listed on the Mariko introductory post (see yesterday), and tell me what your favorite cupcake flavor is.  I think right now at this very moment, I'd have to go with the Chocolate Haupia cupcake from Cake Couture.  All of their cupcakes with chocolate ganache are to die for!

Monday, June 25, 2012

Meet Mariko!

 Welcome to our first Introductory Post for our special Release #8!  As I already shared with you, Release #8 marks our 1 year birthday celebration!  Woo Hoo!  Still can't believe it's been a whole year already.

So, for those of you who follow my personal blog, you may have seen this little girl pop up here and there along the way... Meet Mariko!  She's comes bearing gifts.. and what's a birthday without gifts?  She was originally supposed to be a Christmas release stamp since she is holding a gift, but since gift giving occurs year round, we thought it was more fitting to release her during our birthday party!


Mariko is named after my CBFF (Crafty BFF) Debi!  Debi has helped me from before day 1 of Sister Stamps and has been my sounding board, voice of reason, and source of inspiration for the past couple of years now.  She really is more than a CBFF, she's my stamping sister!!  How fitting then to name this image after her.  When I was thinking of a name, I immediately thought of her since she is so giving and sweet, just like this image.

I was inspired by this tutorial on one of our retailer's sites.. All That Scraps!  This easy peasy gift card holder was the perfect project for all of the store samples.  All you have to do is score here, score there, fold, tape and you're done!  This will be one of the projects we will be making at some of the make 'n takes on Oahu next month.


And here's some of the samples I made for the retail and online stores.  Love me all of those Doodlebug papers!  Since they are 2-sided, it takes the guest work out of worrying if the inside will coordinate with the outside.


So now for the fun part... Wanna chance to win Mariko?  Here's all you have to do:
1)  Leave a comment on THIS POST by June 30, 2012 11:59pm HST.
2)  Become a follower on this blog if you are not already.  Please follow publicly so that we can verify.
3)  Tell me about your favorite birthday gift!  I can't wait to hear...

And stop by this whole week for more Release #8 fun!

Sunday, June 24, 2012

It's A Very Special Release Week!


Are you excited??? Yes, it's been awhile since our last release, but don't worry, this one is totally worth the wait!  This is a very special release for us because not only is it our 8th Release (yes.. 8!!), but it's also our 1st Birthday!!  Woo Hoo!  Can you believe that come July 1st, we'll have been selling our stamps for one whole year?  It's mind blowing to me..can't believe that just a year ago I was worried if anyone would be interested in our stamps and now, 8 releases later.. here we are selling our images all around the world!! (tear..)

Ok back to what's important right.. you want to see what we have for you this release?  You guessed it! (or maybe you already saw these on our retailer's sites)  It's birthday images!  I know these images will be used all year round for all kinds of gift giving- not just for birthdays either!


I'm so anxious to hear what you think!  How do you like our newest additions to the Sister Stamps family?

Tomorrow we start our formal introductions, so be sure to stop in to get to know our new friends and enter to win some candy!  Oh.. and we have other surprises along the way!

Monday, June 18, 2012

Release #8 Coming Soon!

Yes! Gearing up for our big release coming up next month!  Here's a peek...


And... wanted to announce some of the fun planned for the big release... Come visit me if you live on Oahu at one of the make 'n takes scheduled at your favorite Sister Stamps retailer!  All make 'n takes will be free!

Wednesday- 7/4/12 (Independence Day)
10am-12pm:  Ben Franklin Mapunapuna
2pm-4pm:     Ben Franklin Pearl City

Thursday- 7/5/12
6:30pm-8:30pm:  A Place in Time (Kailua)

Friday- 7/6/12
10am-12pm:  Ben Franklin Enchanted Lake
3pm-5pm:  Cute Stuff (Pucks Alley)

Saturday- 7/7/12
10am-12pm:  J's Knicknacks
2pm-4pm:   Ben Franklin Market City

Sunday:  7/8/12
11am-1pm:  Stamps & Memories (Aiea)

Even if you can't stay for the project, please stop by my table to say hi!

For all you Hilo folks.. I wouldn't forget you!!!  The Hilo make 'n takes will be announced at a later date, so stay tuned. Thanks!