Showing posts with label Miyoko. Show all posts

Tuesday, March 5, 2024

Miyoko Is Back!

Welcome back to more re-relase goodness!  I have to admit that I totally forgot what this stamp's name is!  Yikes!  I feel like a bad parent.  I actually had to go into the archives of this blog to see that her name is Miyoko!  How could I forget??  I named her after my best friend!!  We met in 7th grade and are still BFF's till today!  I'm so grateful to have such a good friend after all these years and I'm so happy that they decided to re-release this image!  It's like seeing an old friend again!

OK back to the cards.  As mentioned in yesterday's post... I started out trying to watercolor the images.  I actually really like how everything came out on this first card, except for her hair.  I think I still like the way the hair comes out using the copic markers, but I really like the blending on the parasol and the sentiment!  Speaking of parasol.... I wanted to feature all of the different images included in this set!  The original stamp had Miyoko holding a cupcake since it was our birthday release.  Since then, my sister removed the cupcake and added in other images that you could swap out and make her hold instead.  I wanted to show you all the options this gives since it let's you decide how you want to use the image!

In this first card, I added in the parasol and made it look like she was peeking out from behind it.  You will need to cut out the parasol and then adhere it over her.  In this card, I added some foam tape for dimension.  I felt like there was too much white space, so I added in some flower sequins to fill it up.


This next card is also done in watercolor. I didn't want to place the sentiment going straight across the card, so I decided to make it diagonal and thought it added more interest and filled up the empty space.  Before adhering it down, I watercolored a small area so that the word could be placed over it.  I liked the result cause it added more color to the card.  Then I went to my sequin stash and added in a butterfly and a trail of flowers.  In this card, I made her holding the fan, which is another stamp in the set.


The next card is very similar in layout.  I again added some watercolor behind the sentiment.  Then added in some sequins around it.  I chose the word celebrate since she's holding the cupcake- which was the original design.  See how versatile this set is now?!


Ok now for the copic colored images. Look at the difference between the card above and the card below!  I'm amazed how nice the hair comes out with the alcohol markers.  On this card, I printed the sentiment on the computer and mounted it on washi paper.  I again used stickles- this time I used Stardust, which is an iridescent glitter.  It gives it just the right touch without taking away from the image or washi paper.  Then I added in more flower senquins to fill the blank space.  Love how this card came out compared to the watercolored ones.


I think this last card is my favorite.. probably because I love red washi paper. I had found these washi paper flowers that I had die cut awhile ago in my stash.  I had made a similar background in a Valentine's Day card for my husband, and wanted to do something similar for this card.  Since the washi flowers had a busy print, I decided to keep the sentiment simple by adding in one of my computer printed sentiment strips.  In this card, she's holding a fan.


Please check out my video below featuring these projects.  And don't forget to leave a comment on the video for a chance to win a set of the new release (US only please).  Our previous post has links to the shops where you can order this release from.  See you tomorrow!!


Wednesday, July 31, 2013

Do You Filo?

Welcome to the final day of previews!  I hope you've enjoyed seeing all the projects featuring our new images thus far.  Wanted to thank Kerry for all her help and awesome projects!  Thanks Kerry!

And make sure you check out all the featured Zodiac projects... I'm continuously floored by all the creativeness that goes on using our Chinese animals.  Thanks to Laura, Eunice, and Patti for working so hard all year!

And how can I forget Debi, Eva and Linda!  Don't forget to check out their stuff and Linda's You Tube channel.  She's giving away goodies too, so don't miss out on another opportunity to win!

That being said... wanted to share my final project for this release.  Actually, it not only features our turtle set, but I also included some old favorites in my project!  If you are on You Tube, you may have stumbled on all the filofax craze!  I admit... the first time I saw all the hype, I thought, isn't that just another planner?  Why would you want a regular planner when you can use your smartphone?  As I started watching more and more of those videos, I started to understand why it was catching on again.  I remember having planners while in school and even up to a few years ago.  But gave them up when I got my iphone... now that there's all kinds of FUN stuff to decorate your filofax, I'm back on the bandwagon and loving it.  (much thanks to Nadine Tx, OhaiJoy, and Lfundoo for enabling... Bwahahahaha!).  

So the "authentic" type is made by Filofax, but I didn't really want to spend the money on something I wasn't sure I'd be that into.  So I just got a plain one from my Office Max, and I must say I'm pretty happy with it.  Now I understand the washi tape craze too!  OMG, if you aren't decorating your planner, you gotta try it using all your tapes, stickers, and stamps!

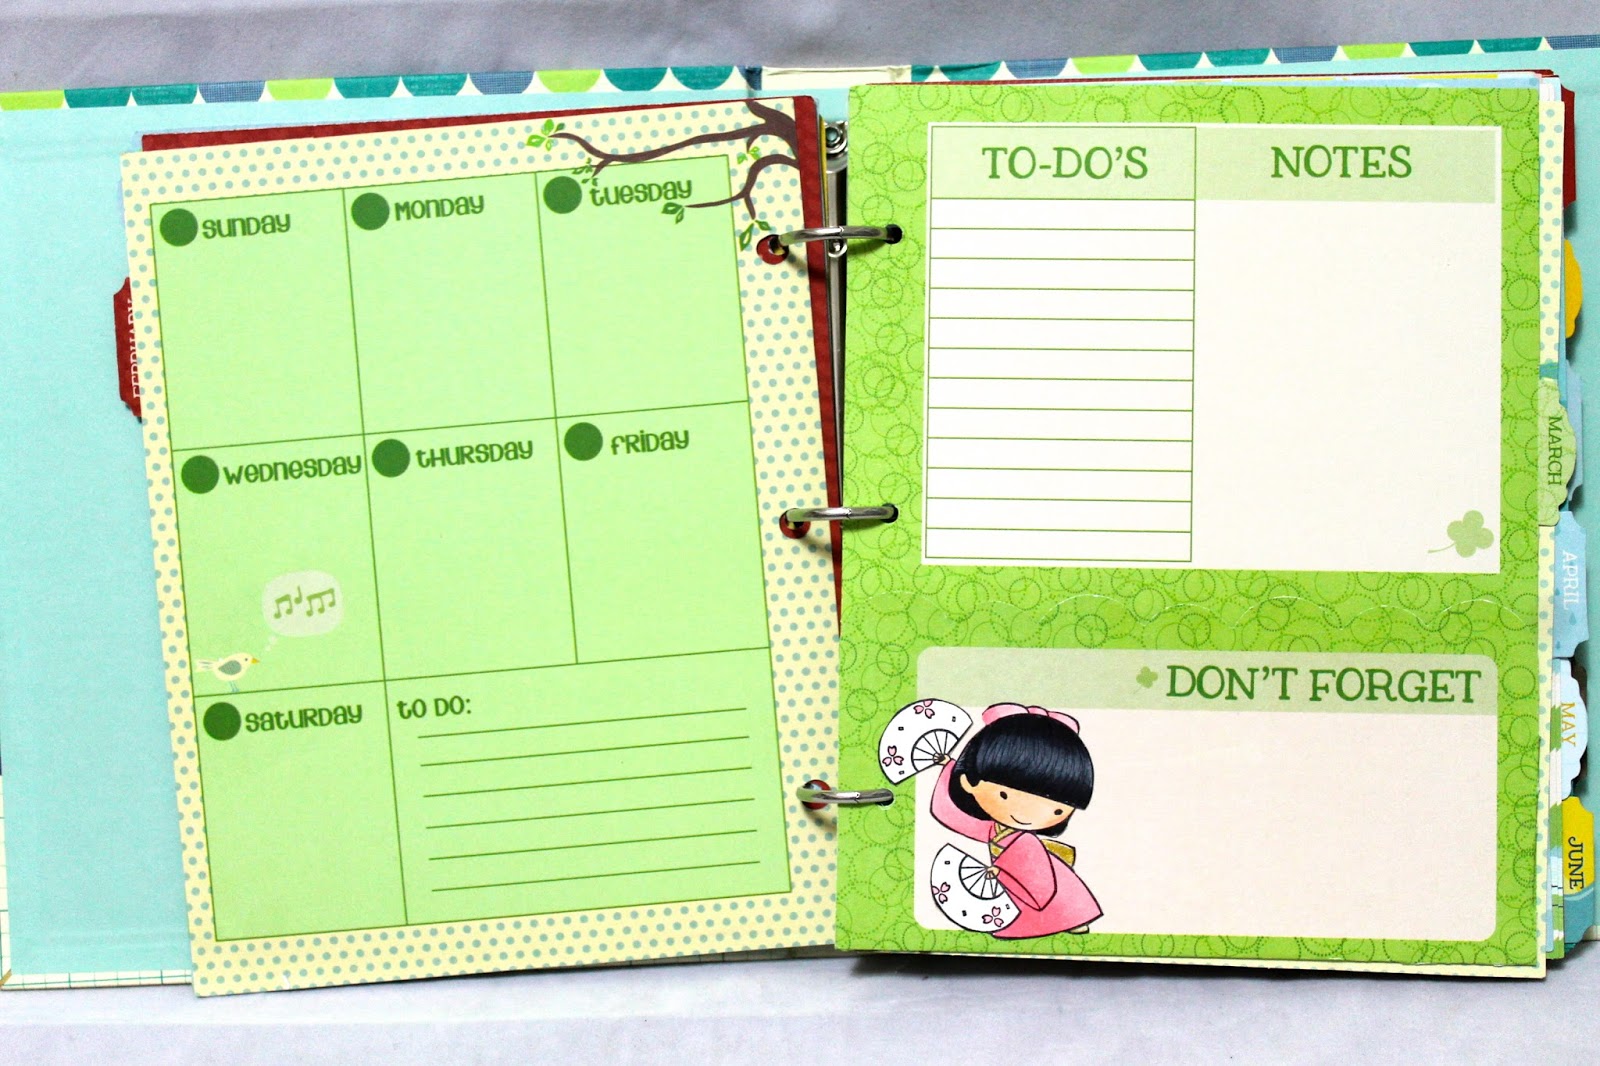
Which brings me to my project.  It's actually a present for my sister. She's coming to visit soon, so I thought this would be a fun present for her.  Instead of a Filofax, I got the BoBunny binder and calendar inserts.  The papers are already cute, so I didn't have to add much except our images to personalize it.  The first page I wanted to share features our turtle set from this release.  I love how it has a To Do section, Notes section and a Don't Forget section.  I think this one also has a pocket, so you can stick in tags and other note.


Here's a better look at our turtle friends.. "Beep Beep"


Here's the other pages- see Yoshimi?


Here's a better look...

And here's Ayako! I think I chose her for this page since sh'e holding an umbrella.


 And can't forget Daba!!!


Otsu had to make an appearance too...


Do you like this next layout?  I had fun hand drawing the kite string..


 And since we don't have any Halloween images (yet- hint hint Denise!).. I colored up Miyoko in her best fall attire and gave her a pumpkin by Dandelion Designs (Hi Jean!).


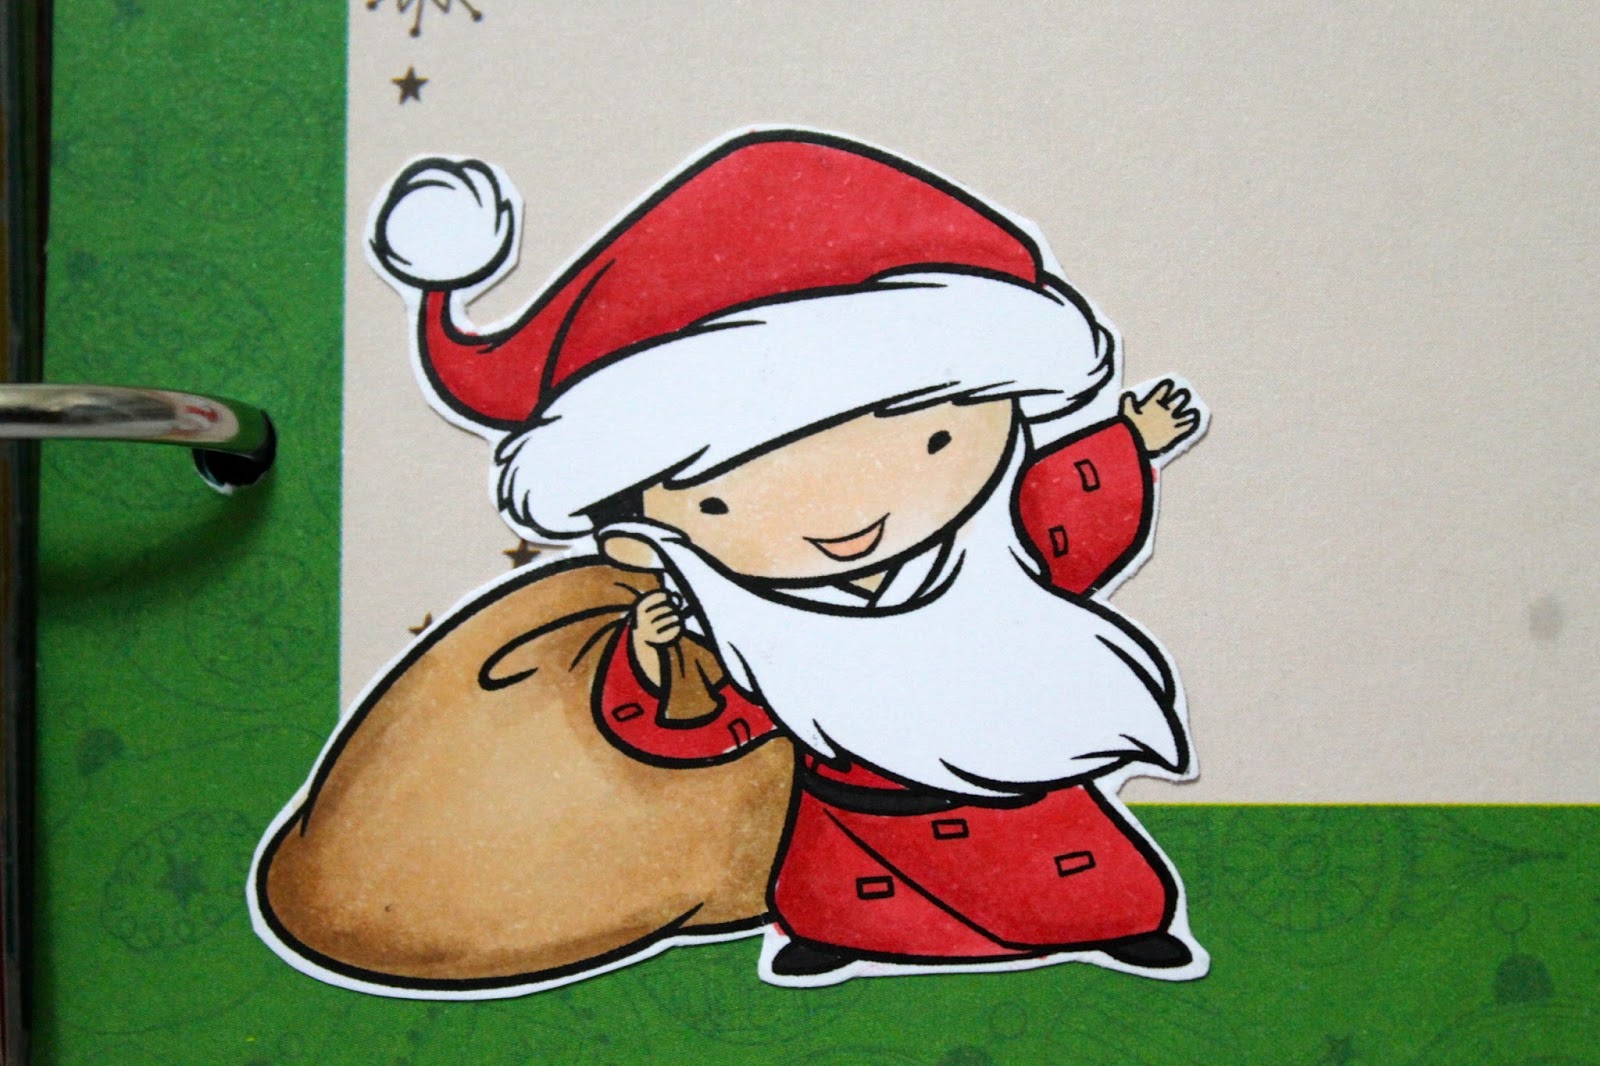
And finally, Santa rounds out December.  Couldn't have a planner without Setsuna right?


 And here he is...


It was so hard choosing which images I wanted to use in the planner.  Hope you decide to start using regular planners again and decorate them with our images!

Don't forget to enter to win our blog candies by leaving a comment on each of the introductory posts.

Friday, March 1, 2013

Miyoko Book Bag and Charm

Happy Aloha Friday!  I'm off today so I thought I'd post something to entertain you...

My sister is the artist, but dabbles in crafting once in awhile.  I guess she got bit by the crafting bug for the holidays and made a bunch of these bags as gifts for family.  She's very well versed on the computer, so all of her work was primarily done there.  She altered Miyoko a bit by taking away her cupcake and added in a parasol.  Love it!  She found some canvas bags while in America, so she printed the image onto some transfers and ironed them onto the bag.


Here's a closer look at Miyoko...


And her real love is beading, so she added a matching charm!  She knows I love hearts, so she used a heart clasp for this one..


And here's a close up of Miyoko.  The charm was made using some heart shaped marbles/glass we found at Ben Franklin here in Hawaii.


She made a few more, so I'll check if she has more photos to share.  I know she gave one to my mom, so I'll try to get a photo the next time I go home.  Until then, wanted to let you know to check our facebook page regularly to see what other Sister Stamp fans come up with!  You can visit our page here...

Wednesday, July 4, 2012

Make 'n Takes Tour Starts Today!

 First of all, wanted to wish everyone a Happy 4th of July!  Hope everyone has a happy and safe holiday!  As for me, I'm starting my first round of make 'n takes at our Oahu retailers from now through the weekend.  Everyday I'll be at one or two of our stores for free make 'n take projects.  Please stop by at any one of our make 'n takes this week (see our sidebar for schedule) even if its just to say hi!

Today I will be at two Ben Franklin's making this project.  It's a gift bag make from a paper bag. Washi papers may vary, but you get the idea right? 


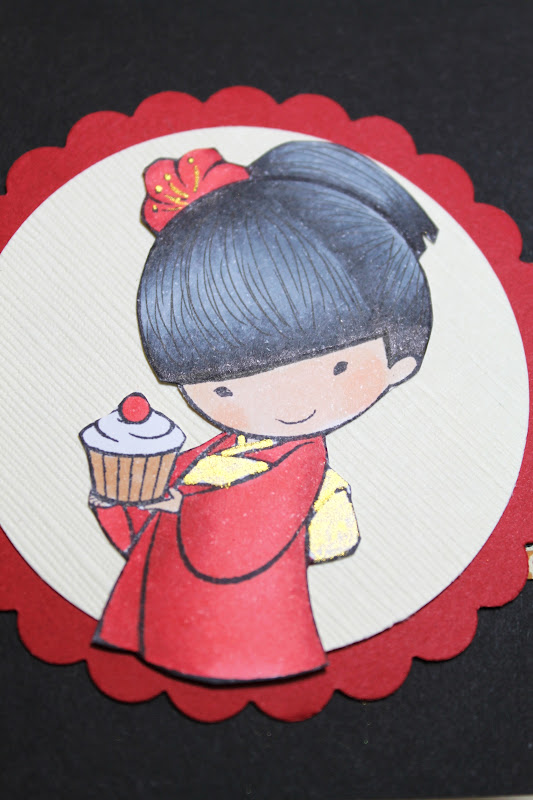
And here's a close up of Miyoko....


Here's the schedule for today:

10am-12pm:  Ben Franklin Mapunapuna
2pm-4pm:  Ben Franklin Pearl City

Saturday, June 30, 2012

Book Worm

We are continuing our celebration with more blog hopping!  Don't forget to visit all of our returning guest DT's blogs to see all of their projects and gain some inspiration!  Here's the blog hop order in case you forgot...

Sister Stamps blog (You are here):  http://sisterstamps.blogspot.com
Mama:  http://luvnthejourney.blogspot.com/
Amy:  http://athousandsheetsofpaper.blogspot.com/
Leanne:  http://liloshaggymoto.blogspot.com/
Nadine:  http://wahinelei.blogspot.com/
Donna:  http://3umbrellas.blogspot.com/
Kris:  http://klusivekreations.blogspot.com/
Linda:  http://simpleandsassycreations.blogspot.com/
Cami:  http://captureaheart-cami.blogspot.com/
Jenny:  http://crazyforpaper.blogspot.com/

If you ever met Akemi, you'll know she is a book worm.  She always has her nose in a book or is talking about a book.  So when I saw this tutorial by the Rubber Cafe, I totally thought of her.  Originally, I saw this work of art by Mama and I wanted to try it out, but didn't have the time or energy to convert the measurements from metric to inches.  Then my girl Linda told me about the Rubber Cafe's tutorial and I got re-inspired to try it out.  Thanks Linda!

So here's my version of the book box...  Wen't with just a plain sentiment by Papertrey Ink for the front of the card and embellished it with flowers by All Natural Accents and a butterfly (sorry no manufacturer name on the packaging).  The sentiment was embossed with gold embossing powder and mounted on Spellbinder labels dies on washi paper I got from the Paper Source.  I love the papers I got on my trip to CHA.  I am hoping I can visit them again when I go back to LA in the fall.  I really need more of this paper!!


Here's a close up of the front.


Decided to take a photo of the side view so you can see that it really does look like a book!

And here's what it looks like when you open the book.  I love that the inside is like a shadowbox!


To make it look like a true shadowbox, I made layer upon layer for added dimension.  The "hills" were cut using a Papertrey ink die" and the banner was made with my Law Fawn banner stamp set and matching ABC's set.  I actually colored the banner with my copics so that the color would match the rest of the project.  Don't know if you can see it, but the background is a very muted washi paper. I love it!!!  It actually has a lot of design, but because the pattern is so muted, it doesn't take anything away from the image.  The flowers were from All Natural Accents and Wild Orchid Crafts.


Here's a closer look at Miyoko.


I'll definitely have to try this project again!  It was so much fun creating a scene!  Don't forget to check out everyone's creations- your next stop is Debi's blog!

Tuesday, June 26, 2012

Say Hello To Miyoko!

Welcome back!  Are you liking the release so far?  I sure hope so!  Well, today I have another cutie to share with you.. Say Hi to Miyoko!  Miyoko is named after my childhood BFF.  We met in intermediate school and became immediate friends.. after going to two different high schools, we reunited again at UH and have been besties ever since! Although we live on different islands and don't get to see each other much anymore, we still share a special friendship.


On to the project!  I just love that Miyoko is holding a cupcake.  What's a party without cake right?  Her pose is just too cute and sassy too!  I decided to make another easy peasy project for our upcoming make 'n takes.  This gift bag is actually the brain child of Debi.  Way back when I first met Debi, she shared a project using a paper bag that was covered on either side to be used for gift giving.  So what I did here was cut a paper bag down to 5" x 5".  Then I covered each side with 5 1/4" x 5 1/4" cardstock, punched holes and added ribbon for the handles.  Voila!  Instant gift bag! You could change up the size depending on how big your gift is and how big your bag is.  


I cut a washi paper strip about 3" wide to go across the bag, then added my Miyoko image mounted on a Spellbinder oval and lacey oval die cut.  The bag looked a little plain, so I added in a Happy Birthday sentiment from an old Hero Arts stamp set.  The stamp was originally all horizontal, but I cut two strips of 3/4" cardstock in pink and stamped Happy on one and Birthday on the other and then cut the ends to look like a flag/banner.  Added in the crystal flower accent which I picked up from a local craft store (sorry no manufacturer name was on the bag).  Then added a heart flourish by DooHickey dies (Magnolia) and some cherry blossoms by Wild Orchid Crafts.

Here's a close up of Miyoko.  Do you like how I colored her hair?  I saw past DT member Amy Young color up Akemi this way and I love the way it came out!!  Thanks Amy!


And now for more candy!  Follow the same rules listed on the Mariko introductory post (see yesterday), and tell me what your favorite cupcake flavor is.  I think right now at this very moment, I'd have to go with the Chocolate Haupia cupcake from Cake Couture.  All of their cupcakes with chocolate ganache are to die for!

Sunday, June 24, 2012

It's A Very Special Release Week!


Are you excited??? Yes, it's been awhile since our last release, but don't worry, this one is totally worth the wait!  This is a very special release for us because not only is it our 8th Release (yes.. 8!!), but it's also our 1st Birthday!!  Woo Hoo!  Can you believe that come July 1st, we'll have been selling our stamps for one whole year?  It's mind blowing to me..can't believe that just a year ago I was worried if anyone would be interested in our stamps and now, 8 releases later.. here we are selling our images all around the world!! (tear..)

Ok back to what's important right.. you want to see what we have for you this release?  You guessed it! (or maybe you already saw these on our retailer's sites)  It's birthday images!  I know these images will be used all year round for all kinds of gift giving- not just for birthdays either!


I'm so anxious to hear what you think!  How do you like our newest additions to the Sister Stamps family?

Tomorrow we start our formal introductions, so be sure to stop in to get to know our new friends and enter to win some candy!  Oh.. and we have other surprises along the way!