Friday, February 28, 2014

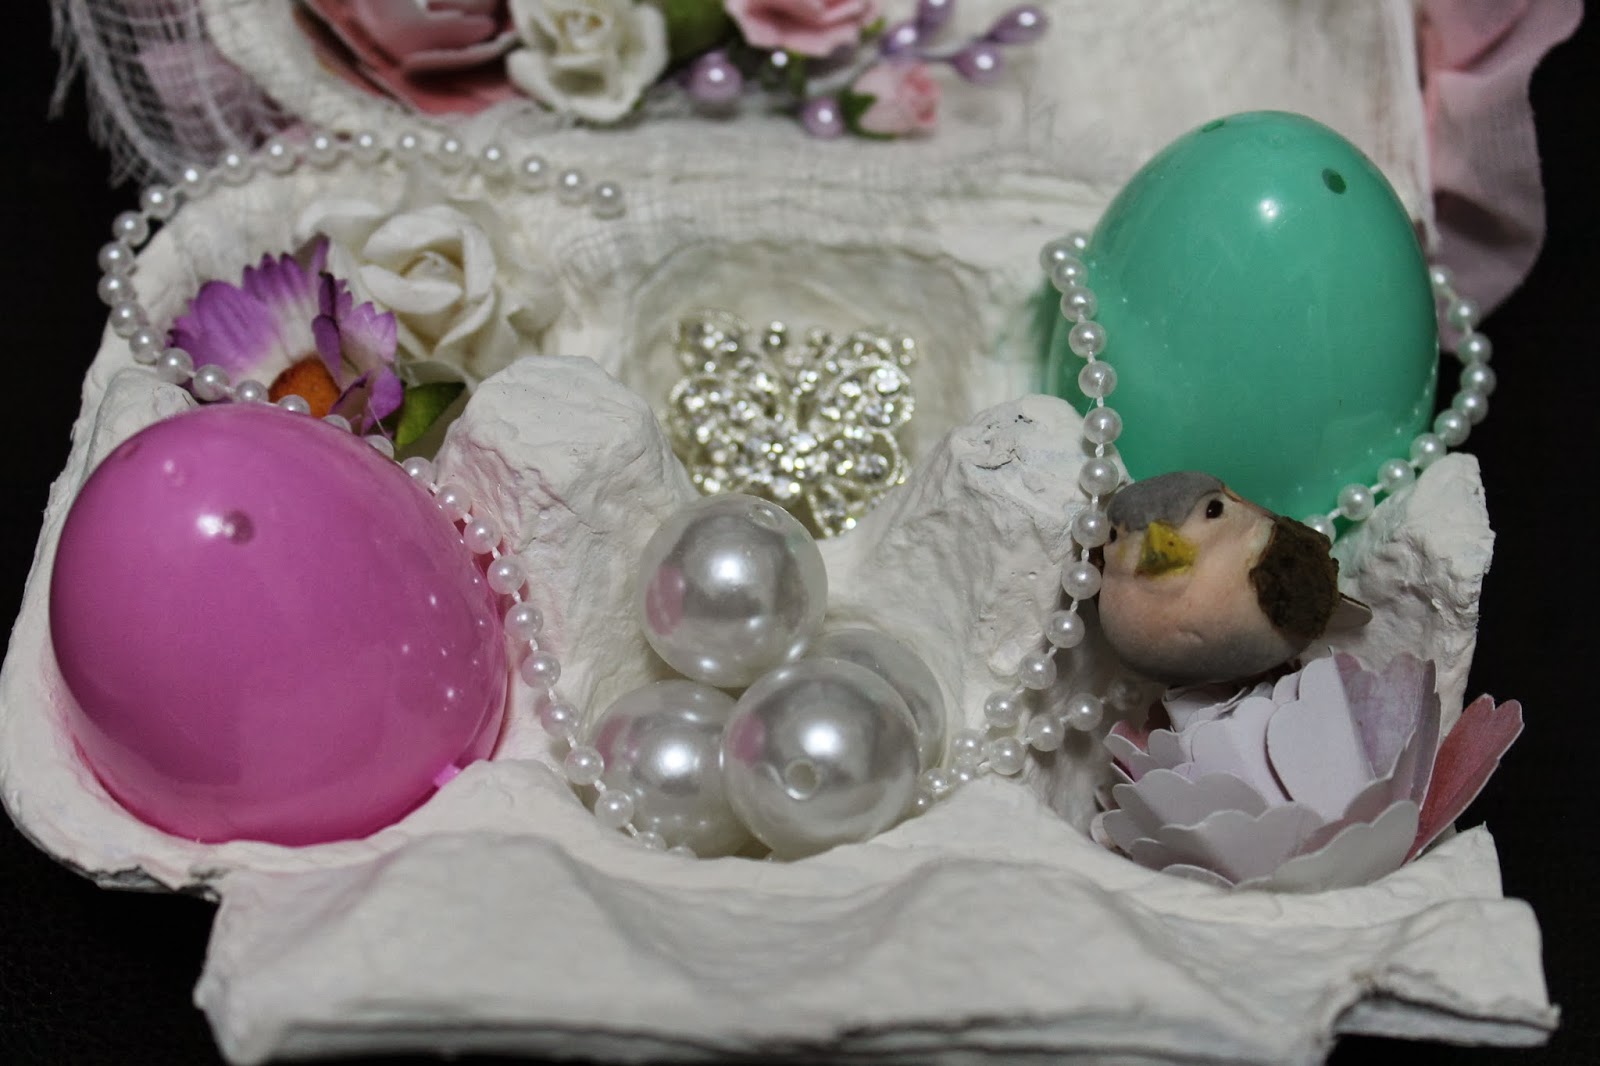
Shabby Egg Carton

Yay!  It's almost release day!  That means soon you can go out and pick up our new images and start working on your Easter projects!
 
Just wanted to thank the amazing Jo from Paperdrama!  She is such an awesome crafter!  So glad I got to work with her on this release.. Thank you Jo!  Don't forget to check out her You Tube channel here...
 
And don't forget to check out Debi and Eva's blogs for more inspiration!
 
For my last project, I was totally inspired by Juliana's shabby chic egg cartons that she featured last Easter.  I guess I had that on the brain for about a year now and really wanted to make one for this release.  Check out Juliana's video here...  and you'll see why I wanted to make one!
 
First thing is we had to eat all the eggs!! Bwahahaha!  I'm joking, but not really.  Over the weekend, our mission was to use up all the eggs so I could use the egg carton. We ended up eating all but 2, so I just put them in a bowl and took the carton!
 
Then I painted it wit some gesso, then a coat of light antique white, which is like an off white color.  After the carton was painted, it was time to decorate!  I used some old jellybean paper by Doodlebug Designs as my background.  Then colored up Kimie and propped her up using pop dots.  Then more flowers by I Am Roses, Wild Orchid Crafts and Prima.


Here's a better look at Kimie...


And the flowers...


Around the edge of the carton, I glued on some pink chiffon pleated trim.  Then added some pearl flower trim in between.

When you open it up, here's what you'll see inside...


The inside cover has moon jumping into a bed of flowers.  Before I put anything down, I added some remnant cheese cloth. Its becoming my favorite shabby accessory on all my projects!


And a closer look at Jade.


For each egg holder, I added some goodies.  Two plastic eggs where you could put more goodies, some flowers, butterfly bling, large pearls, and a strand of pearls.


This project was really fun to make and the good news is, I have the other half to play with!  Ready to go buy another carton of eggs so that I can make more!

Thanks again to all my designers for your great projects!! And thanks Jo for doing videos as well!

Thursday, February 27, 2014

A Sweet Surprise

Wowweeee!  Did you check out who our guest designer is?  Yes! It's none other than Jo of Paperdrama fame!  Just want to thank her for taking the time to make a coloring video using Kimie.  Yay!  So many people have asked me how to color up the images, but I have not made a video tutorial before, so I'm glad she decided to post one for all of us to learn from.  Thanks Jo!
 
Be sure to check out her blog and You Tube Channel for more inspiration!
 
And don't forget Debi and Eva will also have some fun projects to share!
 
So today's project features Kimie again.  I love her!  Her hair came out really cute.. I gotta tell my sis to make more hair like her's.  I started out using a regular A2 sized envelope.  I tend to have a lot of extra envelopes cause I use the base but don't often use the envelopes.  Many people have used the 6x6 size envelopes too, but I like this smaller size. 
 
All you do is score 1" at the bottom of the envelope. Fold on the score line, and then open up the envelope and fold the ends under to form a little bag.
 
 
To start, I cut a small strip of scrap paper by Simple Stories and adhered it around the treat holder.  Then I embellished it a bit with some heart pearl trim, some cheesecloth and a couple of white flowers from my stash. 


Then I added a Doodlebug doily to the background.  I left the doily sticking up as a background.  Then colored up Kimie and adhered to the doily.


Inside the treat holder I stuck some Easter grass and stuck a couple of eggs inside.


When you open the eggs, there's a surprise inside!


For whatever reason, bunnies coming out of eggs reminds me of the Cadbury bunny.  Bock bock bock!


Here's Jade and Moon popping out of the eggs.


Ya never know what will be inside your egg!  More Easter fun tomorrow, so don't forget to visit again tomorrow for more fun!

Wednesday, February 26, 2014

Panoramic Easter Egg


Before I get to my project for today, I have some amazing news!  You might have noticed that last month we didn't have a guest designer right? Well, to make up for it, I've asked this talented lady to be our next guest designer!  Totally stoked she likes our stamps and wanted to help us out!!!  So, to see who I'm talking about check out her blog here...  She also has a You Tube Channel that you won't want to miss checking out here...
 
 
I still can't believe she's helping us with this release!!  And back again is our regular DT to show us what they got:
 
Linda is taking a break this month and will be back for our next release!
 
So when I think if Easter, I am reminded of one of my favorite cartoons growing up.. It's the Easter Beagle Charlie Brown!  My daughter is a total Snoopy fan and loves all of their cartoons.  One of my favorite parts in the Easter Beagle is when snoopy is in the store and looks inside an egg to see all the bunnies dancing around.

My sister recently made some really cool eggs out of her silhouette.  When she posts those, I will link it up here.  I on the other hand have not tried using my silhouette yet (I think I'm scared), so I had to resort to a more manual solution...  I painted an egg I found in the store! LOL!


I know it doesn't look like much, but dang!  This egg took a lot longer to paint than I had anticipated.  I guess it's because the egg was actually made of metal.  The only reason I picked that egg at the store is because it opened up the long way instead of in half the short way.

First I gesso'd it, then added two coats of pink paint.  To add texture, I tried to stencil on it using past and snow tex and glitter.  I think it might been an epic fail, but I'm still learning how to use those mediums.

To help keep it closed, I made a belly band using my chiffon ruffled trim and added a Vicki flower as the focal point.  In the center of the Vicki flower I used one of my pearl bling pieces.  Still trying to use an not hoard!

Here's what the egg looks like when you open it up.


To create the scene, I cut a Styrofoam ball in half and cut it in half again.  Then covered the piece with some lavender satin fabric.  Added a bunch of flowers from downtown LA, Wild Orchid Crafts and Prima.

 Then added in Jade to the scene.  He looks like he's so happy lying in the flower bed!


And here's a closer look!


Check back tomorrow to see my next project!

Tuesday, February 25, 2014

More Bunny Goodness!

 One last intro today, means another chance to win!  Be sure to enter today's and the previous day's posts on how to win our new release images.

So our final image for this release is another bunny! Earlier I introduced you to Jade, and now his friend join's today... It's Moon!  Get it?  Like the Jade Rabbit on the Moon?!  The other funny thing is that there is a newscaster here in Hawaii who's name is Jade Moon.  So no, our bunnies were not named after her... LOL!

I have to say that this project was also inspired by Pinterest.  Can you tell I'm a pinterest fiend?  Yes, I often go there to get ideas and inspiration.  Love it!  It also has some great recipes too!  The main reason I use it is to store things I want to refer back to later on.  It serves as a great reference storage for later.

Basically, its a sour cream container.  You know... cut the paper at 5x6", tape the ends together so it forms a circle, tape one end together and tape the opposite end the other direction so it looks like a triangle.  Just like a carrot!  Found some yellow patterned cardstock from Papertrey Ink that I haven't really used, so I thought it might make a nice carrot base.  The green part was just a strip of green cardstock that I cut using regular scissors and taped it inside the carrot.  These don't have food inside because I made them for the retailers, but you could easily put candy inside them and give them away as Easter treats!


Here's a closer look at Moon.  I did a little coloring on the image and cut them out by hand. Then adhered them to a gingham circle and then onto a white scallop circle.


Here's a bunch more that are on their way to one of our retailers!


If you want a chance to win Moon, all you need to do is:
1)  leave a comment on THIS POST by 02/28/14 11:59pm HST;
2)  So are you a pinterest fiend like me?  LMK what you like to post to your pinterest boards.  As for me, majority of mine are craft related.  Eventually had to split it off into different types of paper crafting cause there were just too many! Oh, and the other board is about food (of course).

Check back tomorrow to find out who our guest designer is for this release!

Monday, February 24, 2014

It's Kimie!

Hello!  Did ya like our first image?  Well, there's more bunnies to come, so stay tuned for more bunnyness. (I know that's not a word).

Next up is another girl playing with bunnies!  Kinda reminds me of our Akemi image, but since Akemi was taken, I had to think of another name for this little girl.  One name that I've always thought was nice and different was my friend's middle name, Kimie.  It's actually pronounced Ki-mi-eh.  Not Kimmie like it looks.

My good friend Kim and I used to work together at East West Center back when I was going to college. She was actually working full time and I was the student helper, but we quickly became friends and would go out together in our free time.  Sadly, my friend passed away very young, but I think of her every so often and laugh at the good times we had together.

One of the things I remember was asking her what her middle name was.  When she told me it was Kimie, I laughed and asked her.. for real?  Kim, Kimie?  So cute yah?  I love it!  It matched her too.  Such a sweet, soft spoken girl.  The other funny thing I remember about her is that when she got behind the wheel, she was like another person!  She drove like Cameron Diaz's character Kimmie from My Best Friend's Wedding.  One of my all time favorite movies!  If you haven't seen it before, you totally should!

But I digress... back to Kimie.

Just coming off of Valentine's Day, it was a bit hard to find any Easter themed stuff to play with.  Luckily, my Target started stocking Easter stuff this week, so I was able to pick up some fun stuff to play with.  So happy to find the plastic eggs!

I saw this post on pinterest and thought it would be a fun project to make using our images.  Here's what I came up with....


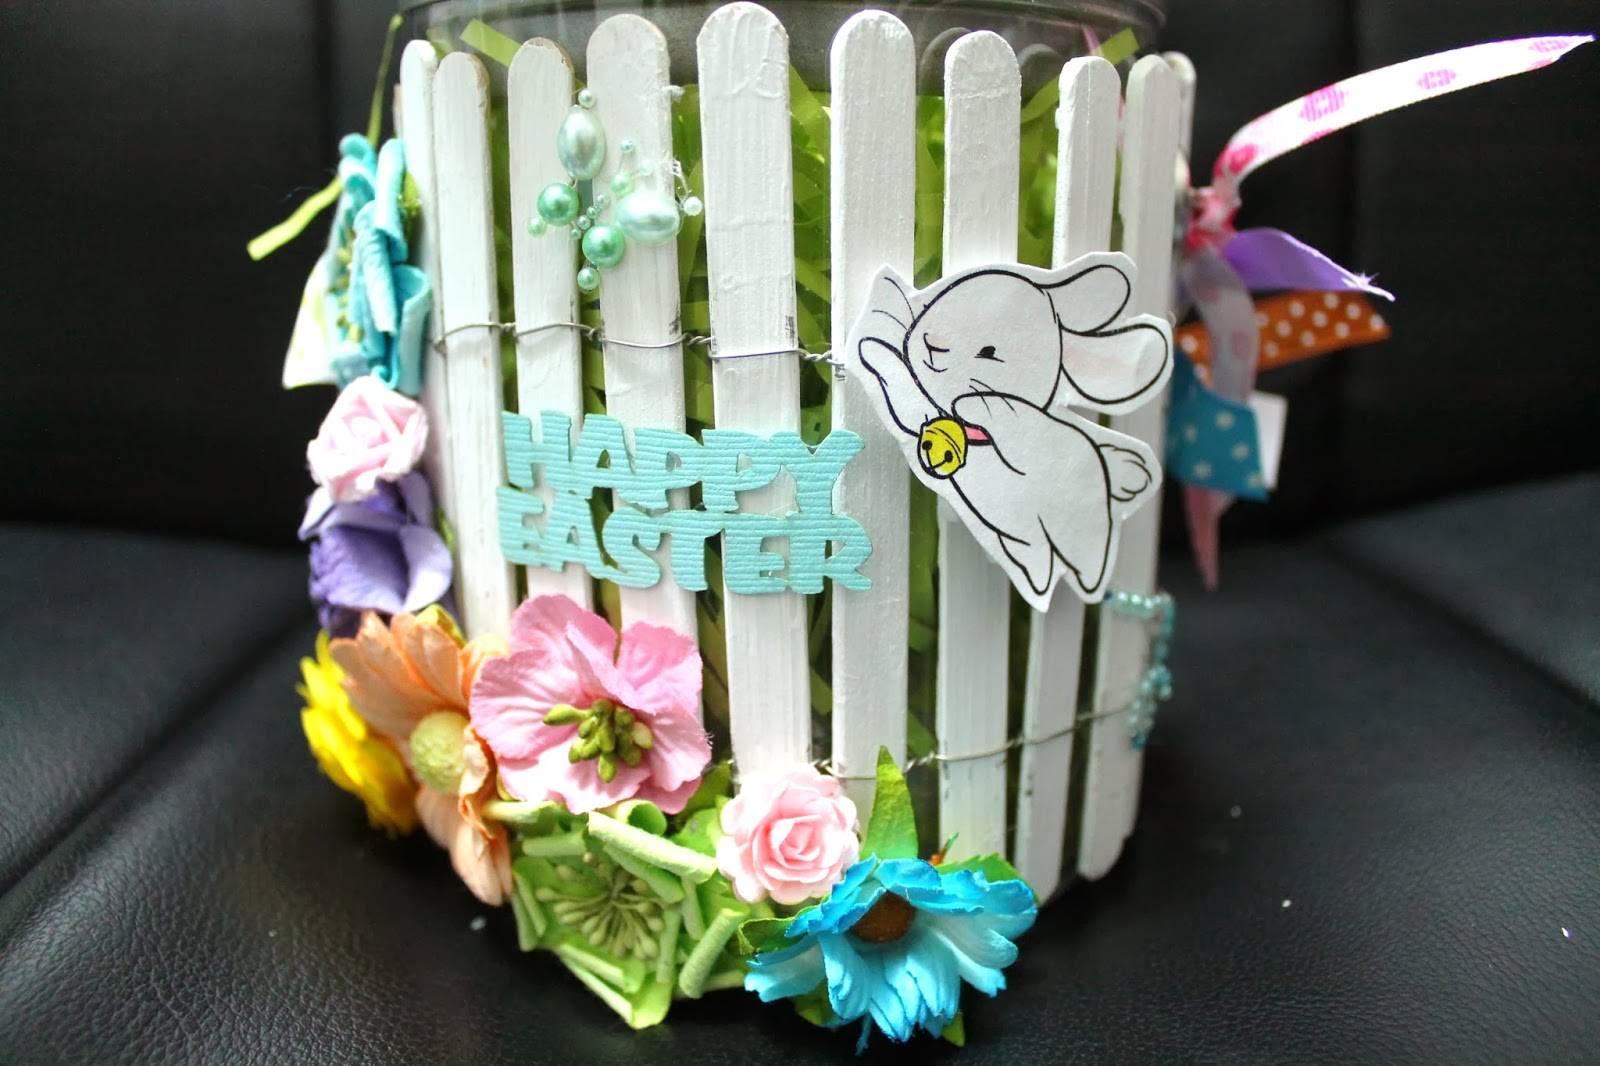
It's a Easter Bouquet!  Let me just say, this project did take me awhile to make, but once I had the vision I couldn't stop.  The first thing I had to do was paint popsicle sticks white to make my picket fence.  I've seen a bunch of tutorials on how to make a picket fence but I've never made one myself.  Frankly I forget what the tutorials said, so I just winged it.

After their paint job, I used some wire and connected them together.  That was not as easy as it sounds.  After I got it to stay, I glued it onto a clear pail, but had to be careful as the pail might melt, so had to use my glue gun that is not as hot as my favorite one.  Once I got the fence on, I was able to start decorating.  Here's an array of flowers from my stash.  Since I took them all out of their packaging, I'm not sure where I got them from.  I know some are by Prima, Wild Orchid Crafts, and I Am Roses, but not sure about the rest.


On the front of the pail, I added a Happy Easter Sentiment by Island Scrabooking, and a butterfly bing by Prima.  And do you see who else popped into the project to say hi!  It's our next image that you'll meet tomorrow.


Isn't he cute?


To decorate the pail handle, I tied a bunch of ribbons to it.  I like the fun look it gives the pail.


Inside the pail I cut a styrofoam ball in half and trimmed it down so that it fit into the pail.  Then added some Easter grass to cover up the styrofoam ball.  Oh yes... and you might be wondering how I got the plastic eggs on the BBQ skewers?  Well, not sure why, but nowadays plastic eggs have holes!  The tutorial shows you that you just stick the skewer into the hole in the egg and voila!  I just trimmed out some of the skewers so they would be at various heights around the image.


 To showcase Kimie, I made a rosette by cutting a strip and scoring it at every 1/4".  One of my "students" and craft fair buddy Susan taught me something in class the other day.  She said when she has to do this type of scoring, she scores first, then cuts the strip to the size she needs.  Genius!!! I followed her instructions and cut my strip at 3", then scored every 1/4", then cut that strip in half so I had two 1 1/2" strips.  Glued the ends together and formed the circle, then adhered a circle over it.  Flipped it over and added Kimie to the front.  Waaaaayyy less work than cutting two 1 1/2" strips and scoring it twice!  I love getting tips from other crafters! It's all about working smarter!


If you would like a chance to win a Kimie stamp here's all you have to do:
1)  Leave a comment on THIS POST by 02/28/14 11:59pm HST; and
2)  Share a time saving crafting tip to share with your fellow Sister Stampers out there!  Oooh can't wait to hear!

Sunday, February 23, 2014

It's Another Bunny!

 
Hello Folks!  It's now February and I can't believe we are a week away from Girl's Day!  But more importantly, it'll soon be time to start thinking about Easter and bunnies, so I thought it would be a good time to release more bunny images! 
 
 
Choosing a name for our new bunnies was definitely a challenge.  It was suggested to me that I name them after the Jade Rabbit... of course I replied, "What is a jade rabbit?".   I imagined a small piece of jade in the shape of a bunny.  It made me smile.
 
Then I found out what Jade Rabbit really was.  If you are like me and don't know what that is, check it out here...
 
Not what you expected right?  Nevertheless, I thought it was still a cool name, so I adopted our new bunny using the name Jade.  You'll meet the other bunny Moon later.
 
Now you may recall my sister had drawn about a dozen bunnies for me when it was year of the rabbit a few years back.  This was primarily for a Chinese calendar I was selling at craft fairs.  I think it was a challenge for her to come up with so many different bunny poses, but she managed to do it!  Jade is one of my favorites of the bunch!  I like that he's lying down on his back, which is rare for a rabbit.


I made this card for a copic class I taught recently.  True to form, I had procrastinated to the last minute before I came up with this card.  Normally in the Copic classes, I try to focus on coloring and try not to do anything fancy.  Finally I decided to bust out my old egg dies by Spellbinders and my trusty Martha Stewart grass punch.  I initially picked Prima's chalkboard papers from their Optimist collection in case we had students who wanted to use different colors from their collection without worrying if it would match the paper or not.  I joked and told them that it was the Easter Bunny relaxing before he had to go deliver eggs!

But now that I look at it, how fitting it looks like a night scene.  After all, we normally associate the moon with night time right?

The sentiment used is by Island Scrapbooking and the egg paper is by Simple Stories.

The coloring technique taught here is to blend a color to white. It's one of my favorite techniques for coloring up animals.  For some reason I seem to always forget about it, so I'm gonna have to make a more conscious effort to remember to color up my images using that technique more often.

Yawn.... it's time for me to go to sleep.  I have another long day of crafting tomorrow!  Be back soon with another introductory post!

Oh yes, and cannot forget.. if you would like a chance to win Jade, here's what you need to do:
1)  leave a comment on THIS POST by 02/28/14, 11:59pm HST; and
2) tell me about your favorite technique to use in crafting.  I'm totally interested in hearing what you all love to do!  Good Luck!

Saturday, February 22, 2014

Release #21 Already?

YES!  Can't believe its almost time for our next release!  And can you guess what up next?


That's right!  New bunnies to add to your collection!  Just in time for Easter, but let's be honest, you can use these little guys anytime of year.  Be back to introduce them to ya'll!

Sunday, February 2, 2014

Candy Winners and a Sneak Peek

Hi!  I'm back!  Didn't forget about the blog candy, so here's a list of the winners!

Minako:  Laila B.
Harumi:  Kathy Dinh
Misaki:  Cindy (Simply Cindy)

Congrats!  Please email me your mailing address to sisterstampsllc@gmail.com  Thank you everyone for playing!  If you entered to win on Linda's You Tube Channel, keep checking to see if you've won.  She'll be posting the winners from her channel later on.

And now for a sneak peek at what's to come next!

Saturday, February 1, 2014

It's Release Day!

Really?  Is it really February already!?  Seems like I was just in LA shopping my heart away.  Now I'm sitting here planning out our next release!  

Before I share some final projects using our new girls, I just wanted to thank my Design Team again for all their great work!  Thanks Eva, Linda, and Debi! You guys are the best!

And thank you to everyone who played in our blog candy giveaway!  Can't believe how many people have already entered!  Will be announcing the winners soon, so stay tuned.

So I host a craft fair at my house every year, but this year I also did another craft fair in November.  Call me crazy, but I decided to participate at the last minute because I had some stuff already made and wanted to test the market.  Every year I try to come up with new ideas because let's face it, you don't want to buy the same calendar every year right?  Used the images Denise colored up on the computer and it came out very nice!  Even nicer than my coloring!  Because these were digital images, I could size them larger for a 12x12 layout, but you could easily do this type of project on a smaller scale using the rubber stamp size.

This calendar also gave me a good excuse to bust out my washi paper!  I printed out the year at a glance calendar on the computer and the 2014 are PTI number dies.  They are large but sure do the trick for my calenders!  Here's Harumi...


And Minako.  I espeically love this one. So sweet!


And finally little Misaki!

Thank you for joining us for all the projects and previews.  I'll be announcing the blog candy winners soon and share our next release sneak peek!