
Next up is another girl playing with bunnies! Kinda reminds me of our Akemi image, but since Akemi was taken, I had to think of another name for this little girl. One name that I've always thought was nice and different was my friend's middle name, Kimie. It's actually pronounced Ki-mi-eh. Not Kimmie like it looks.
My good friend Kim and I used to work together at East West Center back when I was going to college. She was actually working full time and I was the student helper, but we quickly became friends and would go out together in our free time. Sadly, my friend passed away very young, but I think of her every so often and laugh at the good times we had together.
One of the things I remember was asking her what her middle name was. When she told me it was Kimie, I laughed and asked her.. for real? Kim, Kimie? So cute yah? I love it! It matched her too. Such a sweet, soft spoken girl. The other funny thing I remember about her is that when she got behind the wheel, she was like another person! She drove like Cameron Diaz's character Kimmie from My Best Friend's Wedding. One of my all time favorite movies! If you haven't seen it before, you totally should!
But I digress... back to Kimie.
Just coming off of Valentine's Day, it was a bit hard to find any Easter themed stuff to play with. Luckily, my Target started stocking Easter stuff this week, so I was able to pick up some fun stuff to play with. So happy to find the plastic eggs!
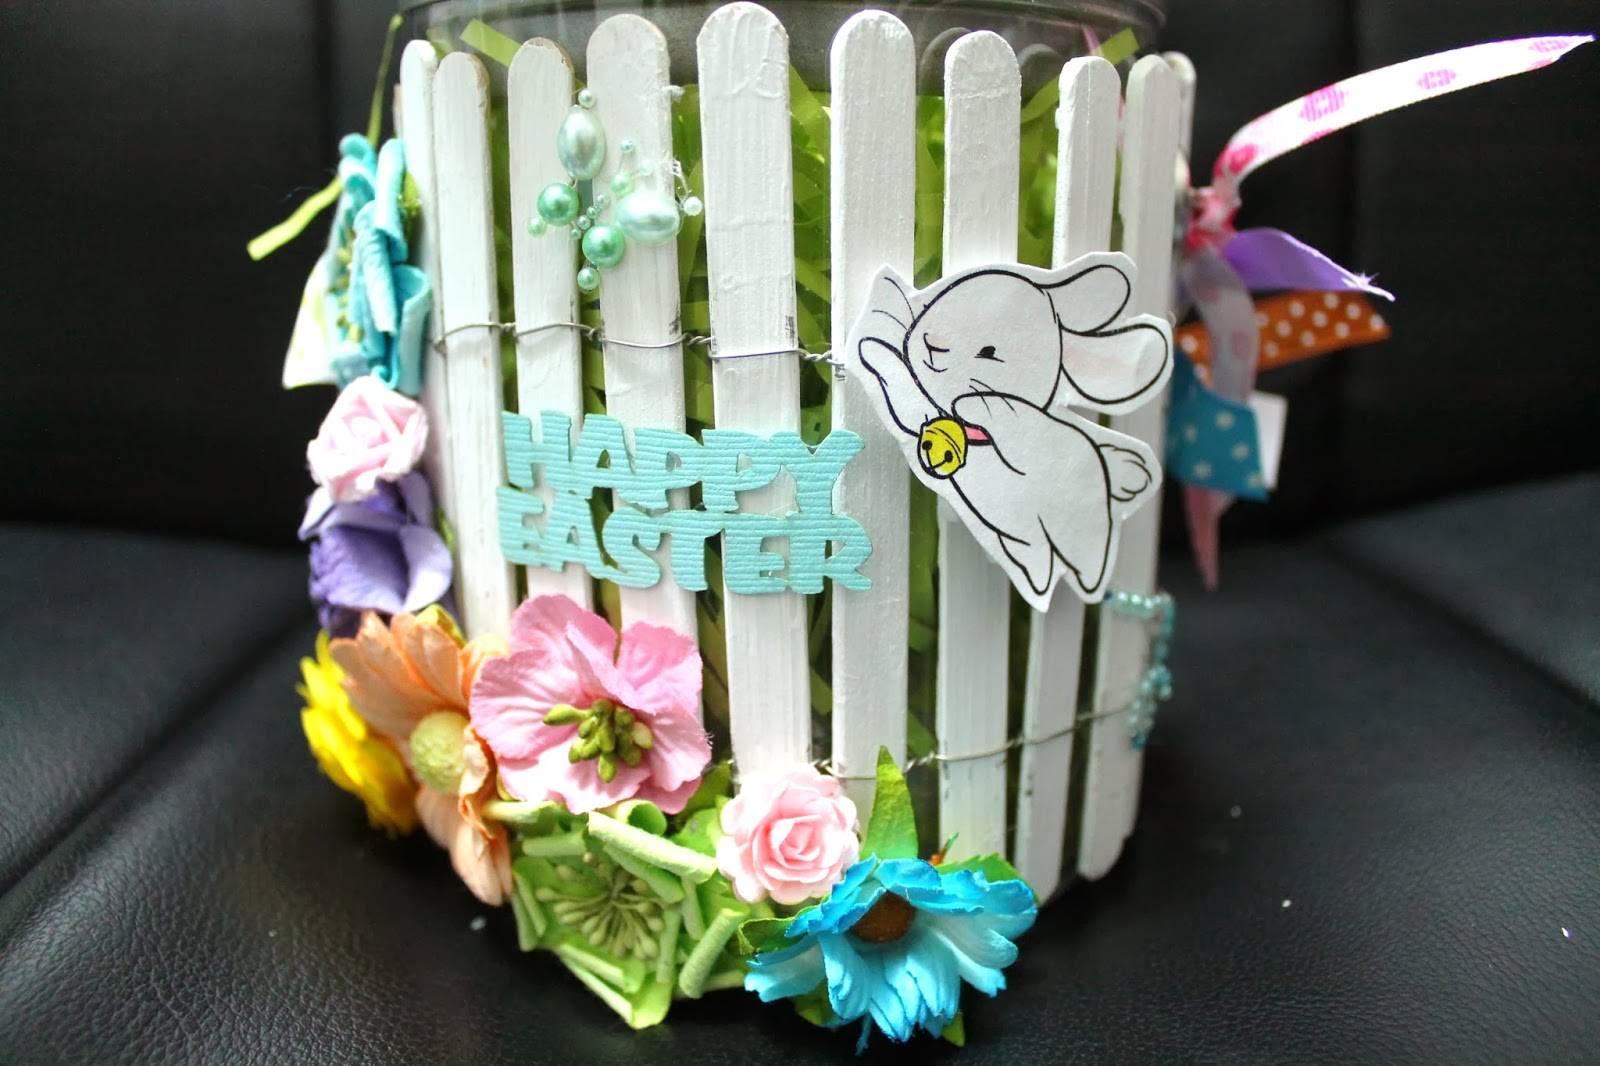
I saw this post on pinterest and thought it would be a fun project to make using our images. Here's what I came up with....

It's a Easter Bouquet! Let me just say, this project did take me awhile to make, but once I had the vision I couldn't stop. The first thing I had to do was paint popsicle sticks white to make my picket fence. I've seen a bunch of tutorials on how to make a picket fence but I've never made one myself. Frankly I forget what the tutorials said, so I just winged it.
After their paint job, I used some wire and connected them together. That was not as easy as it sounds. After I got it to stay, I glued it onto a clear pail, but had to be careful as the pail might melt, so had to use my glue gun that is not as hot as my favorite one. Once I got the fence on, I was able to start decorating. Here's an array of flowers from my stash. Since I took them all out of their packaging, I'm not sure where I got them from. I know some are by Prima, Wild Orchid Crafts, and I Am Roses, but not sure about the rest.

On the front of the pail, I added a Happy Easter Sentiment by Island Scrabooking, and a butterfly bing by Prima. And do you see who else popped into the project to say hi! It's our next image that you'll meet tomorrow.
Isn't he cute?

To decorate the pail handle, I tied a bunch of ribbons to it. I like the fun look it gives the pail.

Inside the pail I cut a styrofoam ball in half and trimmed it down so that it fit into the pail. Then added some Easter grass to cover up the styrofoam ball. Oh yes... and you might be wondering how I got the plastic eggs on the BBQ skewers? Well, not sure why, but nowadays plastic eggs have holes! The tutorial shows you that you just stick the skewer into the hole in the egg and voila! I just trimmed out some of the skewers so they would be at various heights around the image.

To showcase Kimie, I made a rosette by cutting a strip and scoring it at every 1/4". One of my "students" and craft fair buddy Susan taught me something in class the other day. She said when she has to do this type of scoring, she scores first, then cuts the strip to the size she needs. Genius!!! I followed her instructions and cut my strip at 3", then scored every 1/4", then cut that strip in half so I had two 1 1/2" strips. Glued the ends together and formed the circle, then adhered a circle over it. Flipped it over and added Kimie to the front. Waaaaayyy less work than cutting two 1 1/2" strips and scoring it twice! I love getting tips from other crafters! It's all about working smarter!

If you would like a chance to win a Kimie stamp here's all you have to do:
1) Leave a comment on THIS POST by 02/28/14 11:59pm HST; and
2) Share a time saving crafting tip to share with your fellow Sister Stampers out there! Oooh can't wait to hear!
She's so cute and I love the leaping bunny too! I don't really have any time saving tip, I can't say I'm a quick crafter! But will be interested in the other comments :)
ReplyDeleteSuch a cute project...love the leaping bunny and the sweet girl surrounded by her furry friends. One fast way I have found to decorate the inside but not taking time is to add either strip of paper or washi tape to the edge and then cutting the front panel just a little short so it shows through to the front of the card. Hope that makes sense.
ReplyDeleteLove your project and today's Kimie stamp. The only time saving tip I can think of that I use is to pre-plan what I'm going to do. Then I gather all my supplies together first. That way I'm not having to stop and constantly search for what I need. It also helps to be organized and know where everything is.
ReplyDeleteLove love love!!!
ReplyDeleteTime saving? Oh you mean it's not supposed to take years to finish something? LoL. Just joking. What I like to do is fill a small pencil case with markers, stamp a ton of images onto index cards, and color on the go. When I'm standing in line somewhere and there's a hard surface, when I'm waiting in the car.... That way when I need a image for a card or something, I almost always have at least one already colored.
Oh, I love Kimie stamp sooooo much! I have pet rabbits, so this one really speaks to me! I'm so sorry you lost your friend; this is a wonderful way to honor her. My time saving tips: 1) use scrapbook, origami, or designer papers and draw the colors from the paper so you don't waste time trying to figure out what colors to use and (2) when stamping images, I stamp multiples of the same and put them with the stamp case so that it makes it quick to make a card in the spur of the moment. Thanks for another chance to win - love, love, love your stamps!
ReplyDeleteThat is one heck of a cute project. Love that name Kimie too. In fact, that was the middle name I had picked out IF I had a daughter. LOL. No need to enter my name in the drawing. Just wanted to comment.
ReplyDeleteWow...gorgeous creation!!! I love it!!!
ReplyDeleteTo save some time...once I know what I want to do I start figuring out what colors I will use, what kind of embellishment, the layout that will look great with....during work...dish washing... and once I sit on my chair I know where to start!!! ; ) Hugs, Laila.
So, so cute. Thanks for the chance to win the image. I use challenges to help speed up a card. Starting with a layout and/or colors is always a big help.
ReplyDeleteOh this is super sweet! Great idea. all the hard work was worth it. You colored her beautifully to match the Easter theme. Moon is a nice touch. It was nice to hear the story behind Kimie's name. No need to enter me in the contest just wanted to comment. ^.^
ReplyDeleteKimie is a cute stamp and how sweet it was to name the stamp after your old friend.
ReplyDeleteTime-saving crafty tips are what I need because I'm always in a bind for a gift tag or card! The best thing I can think of is to re-make something from the past. Keep the basic design and layout, but change the color or subject slightly to fit the new person or occasion you are making it for.
Adorable bunny babies :) love it! One thing I like to do it stamp multiple images and color while watching tv. I save all my images in a bin so when I need to make a card, I already have the colored images on hand :)
ReplyDeleteabsolutely adorable. my daughter would love this stamp. I keep everything. For example if I'm doing a project and I cut or stamp too many images, I don't throw it away since I probably can use it for another project. Just recently I needed to make Valentine goodie bags and needed tags and I remembered I had extra hearts from another project and so I used it as tags for the goodie bags.
ReplyDeleteThis is the cutest stamp, going on my wish list. I am not sure this is time saving, but I like to stamp or print my new images, so have lots of things to color if I am in a coloring mood, and lots colored images if I am in a creating mood.
ReplyDeleteWhat a sweetie! I punch out flowers with all my bits of scrap paper and stamp extra sentiments to use on future projects. :)
ReplyDelete